Powered By Blogger

Monday, 28 March 2011

Black Pudding Potato Cakes


This dish is scrumptious, mix together 50/50 black pudding / baked potato along with the odd duck egg to bind together, season and fill a chef's stainless steel ring.


Once filled, push out a portion from the ring and slice with a knife against the ring giving you a nice even piece.


Coat in seasoned flour.


Dip in an egg wash and coat in breadcrumbs or Ryvita crumbs as I've used here. Gently fry and serve with a rocket & watercress salad, garnishing with an oozing poached duck egg along with a mustard seed mayonaise sauce.


What are you doing with your black pudding today?

Tuesday, 22 March 2011

Chroma P18 Type 301 Design by F.A.Porsche

What the eck is that! I hear you cry, I must confess so did I when I first heard about it. Well what is it your asking right? Is it a sports car? As it got anything to do with N.A.S.A.? Well none of those, well not exactly, you see it's a kitchen knife, yes that's right a kitchen knife, alright calm down stop laughing! This is no ordinary kitchen knife or chefs knife as some would prefer to call it.

You see, Franco my old mate from www.sausagemaking.org recently asked me to review this knife for him, but before you say "oh yerrr!" let me tell you I've never received payment to review any of the tools, gadjets or other products including foodstuffs that people send me. This means I get to say what I want to say without feeling obliged to anyone and that includes friends like Franco. In fact the last time I reviewed something for him, it was the American Dakota Water Sausage Filler and I slated it, probally why he doesn't sell it.(and I feel proud saying that)

Anyway moving on, the postman knocked and I remembered straight away that this maybe the knife, so with a spring in my step I reached the door and quickly signed for my parcel. Yes it was long and narrow, just as expected, but it felt light, I'm thinking the box is empty he's winding me up, but no, the parcel is intact. On opening the well wrapped package, I was faced with an ordinary and perhaps modern cardboard sleeve, this is not encouraging I thought. Written on the sleeve was all the above information plus the addition of a claim, it was made from pure 301 steel in fact the finest Japanese blade steel. Now it's getting my attention!

On sliding off the sleeve, I revealed what is a very slick black narrow hinged box made from either bamboo or some kind of soft but hardened balsa, I open the lid and inside I see a protective black foam. Who has gone to so much trouble to protect a knife I'm asking myself, then on removing the foam and set inside more black foam but of another origin is this gleaming silver stainless steel knife in all it's glory.

Now I'm asking myself why as Franco chosen me to review this item, he knows I don't do modern, he know's I'm traditional, he's played a very risky strategy sending me this stylish knife, or is he so bloody confident about this knife that I'm being his greatest challenge will be convinced this is truly and exceptional knife? We'll see!


OK let's test it, today I'm curing a salmon for Gravlax, so let's start cutting my dill, this is the finest texture of all food items I use in my reportoire. Blooming eck! I can't believe it, this knife cuts at the very tip of the dill almost creating dust such was the cutting, so fine I did not need to see-saw the knife over the cuttings. I did the obligatory onion sliced & diced, the humble potato julienne (chipped) and the nobbly and prickly pineapple all with an ease I've never experienced before, it even sliced a soft over ripened tomato. This knife is making me a little nervous such is the power in it's ability to be so accurate.


Don't do this at home folk's, but I even ran the knife over the back of my hand where it gave my hairs a shave as close as my razor. My wife is now shouting at me saying "you stupid bugger!, you know you are on Warfarin" (anti-coagulant). So don't try that at home, there I've said it twice now.

On writing this review I can tell you I have no idea how much this knife cost's, those of you who know me will recall I'm always saying when buying your butchery/charcuterie/kitchen tools to buy the best you can afford. I don't know what this knife cost's as I've mentioned, but if it is expensive then save up, it will be worth it!

On turning the knife upside down to check on the blades fine edge, I thought my eyesight was failing, you see looking down the length of the blade as you would a sword, I swear the blades edge became invisible, now that is seriously sharp!

I'm not going to bang on about it's engineering or it's looks, you decide whether you like it's design. I'm only interested in telling you if I think it is a knife worth buying for it's practicalities. I can tell you though, that the design of the beaver tail handle is comfortable to use and takes pressure away from the palm of your hand as you go about your culinary business. This I can tell you is a big plus.

I must tell you that I'm going to return to this post and add to it, I want to use the knife over several weeks giving it many jobs to do before completing this review.

In the meantime you can checkout www.chromaknives.co.uk for pricing and information on how to care for your product.


Sliced Lardy cake/loaf without a serrated edged knife


Soft jellied ham hock terrine wrapped in clingfilm and not a single carrot dragged out


Brawn sliced to perfection, what an edge and smooth face, ideal for a deli I'm thinking


Ok, just to finish this post, I've put the knife through several other tasks including butchery and the filleting of salmon.


It even works left-handed as head chef Paul Rebsdale of the Oxenham Arms demonstrates (had to slip a joke in somewhere!)


I have to remind myself here this is a general purpose knife and I'm asking of it to take care of special tasks.


The filleting of the salmon was made easy, however the knife did not like the carving of a cured (Gravadlax) salmon as the blade was to short in the length and a tad too thick for that specialist job.


In summary this kitchen knife is one of the best I have ever used, it cuts exactly where the blade sits unlike some other knives, kitchen prep and general purpose is it's forte. Me pushing it through specialist tasks was asking too much from it, after all the company do make special knives fit for purpose, but I did not have these to try.

So impressed was I with this knife, I have left it at www.empirefarm.co.uk where some of the tests were carried out, the reason behind this is to allow the students who attend the many butchery,charcuterie and cookery courses there to experience working with such a high quality item.

Update:
Having used the knife now for some month's, I am still very pleased with it, however a safety issue was put to me recently which I must share with you. I tested the knife straight from the safety of its box and obviously used it in my hand, what I failed to do was lay the knife down to see what would happen, on doing so the knife with its super ergernomic handle would sit on its back, this meant the blade would offer itself vertically and therefore put someone at risk of cutting themselves quite badly.

What a shame, it offers all those other qualities you expect from a good knife and yet this last detail is of concern, so do choose wisely before parting with your money.

Bon courage folk's.

Saturday, 19 March 2011

Gala Pie

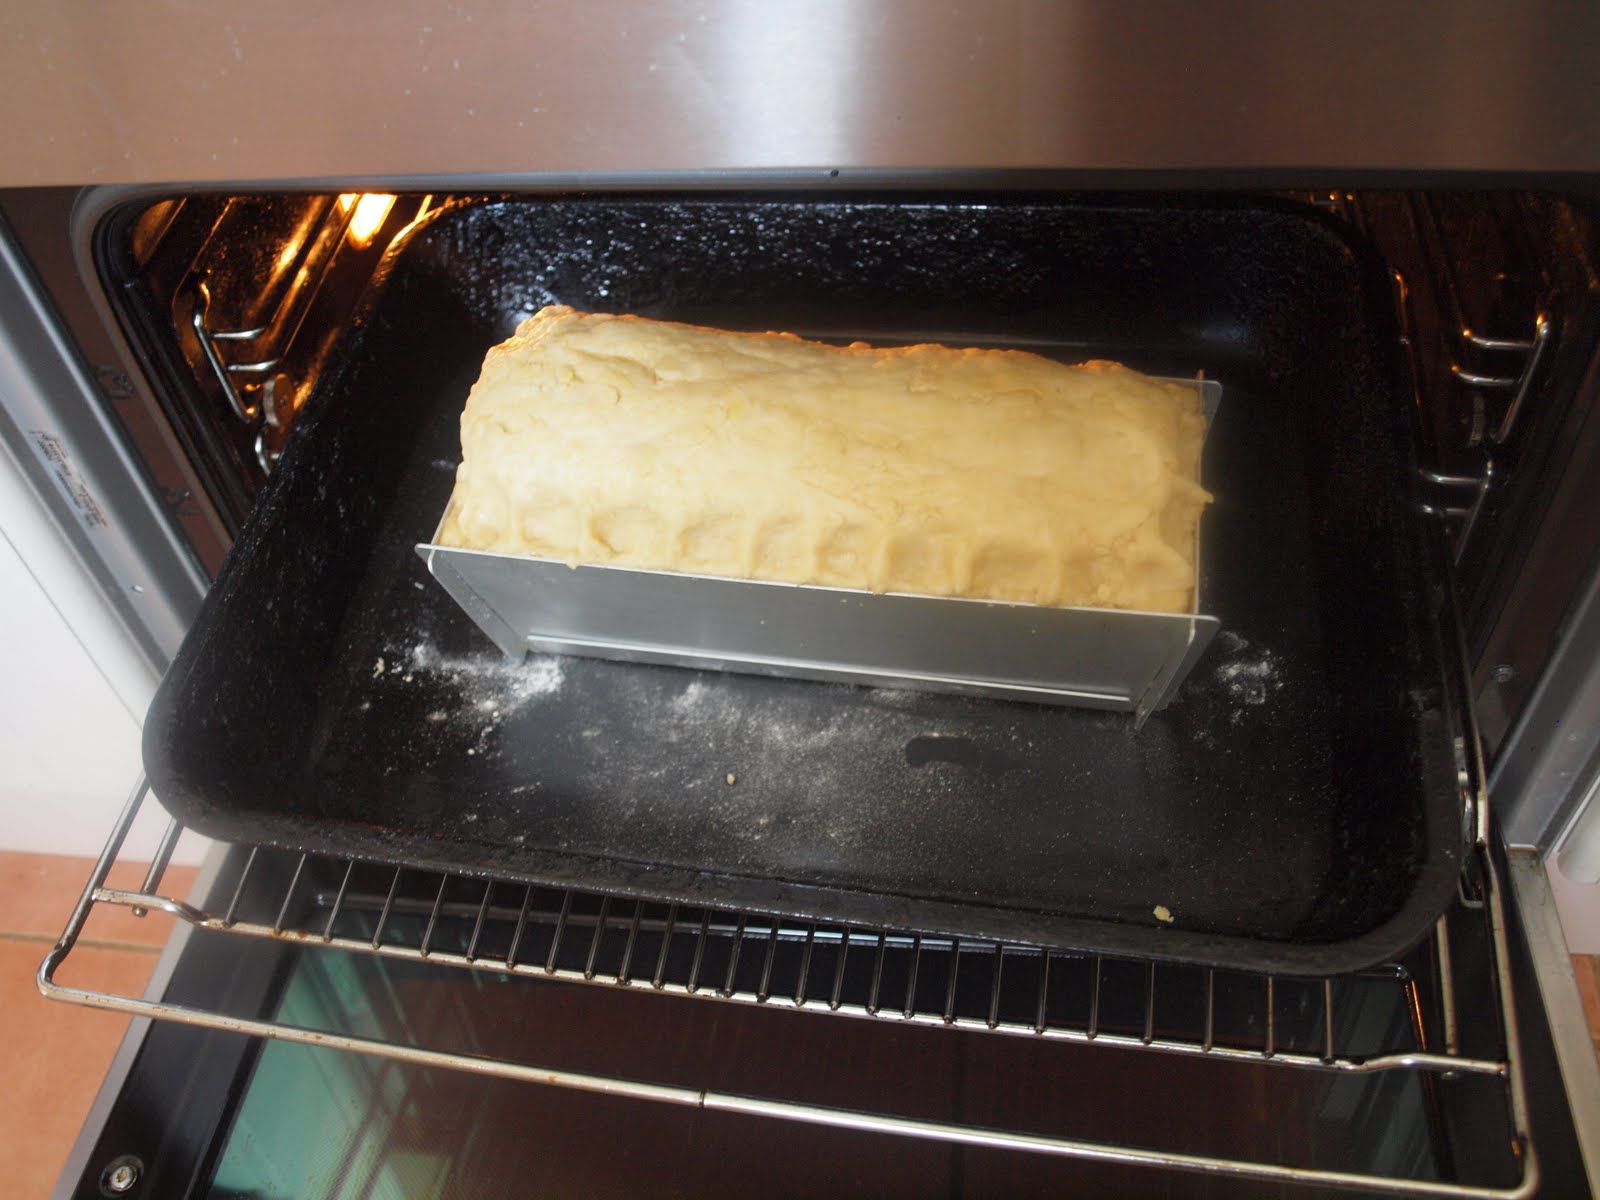
Staying on an Easter theme, I thought I would share with you how to make the perfect Gala pie. I prefer to use the veal & ham pie moulds made by Silverwood of Birmingham, but you can also use a terrine or a deep pie dish.


Build your mould together and grease and flour the inside.


Now hand raise some hot water pastry inside your mould, whilst remembering to save some for your lid.

Half fill your pastry mould with your seasoned pork mix and then using a tablespoon form a channel in the centre of the meat, this will allow your boiled eggs to sit centrally without rolling to one side.


Having done that, top and tail approximately seven hard boiled eggs until you can see the yolk.


Now butt up your eggs end to end and along the length of your pie mould, this will ensure when you slice your finished pie, you will see the yellow yolk all the way through the pie. (This is a trade secret and a good sign of a good and generous pie-maker)

Having placed your eggs in your mould, cover them with your seasoned pork.


Place on your pastry lid, crimp the edges, wash with egg and place in your oven at 180c degrees for 70 minutes. This next part is important, allow to cool for at least 40 minutes before removing the metal pie mould, this will stop the pie from bellying out.


You can if you wish and after first cooling your pie, egg wash the sides and finish off in a hot oven for a further 15 mins. Once totally cooled, you can fill the pie with gelatine and once set, slice and serve.


A pie made in this way and with the exception of the eggs, is called an "Ascot Pie".

Sunday, 13 March 2011

Pate de Paque (Easter Pie)

When I was living in France, I was intrigued by the French charcutiers who followed tradition by making some products only at the appropriate time of year. I made Gala pies on a weekly basis much to the amusement of the French and yet they made their equivalent the Pate de Paque only at Easter time. There are many versions of this French pie, the one I have adapted here is from the Limousin & Charente region of rural France.


They use Brioche pastry and a favourite of the French but one I could never accustom myself to using or eating, it is far to sweet for my liking, I’m more of a savoury person. For my pie I have used a hot water pastry, however if you wish to do as the French do, then use this brioche recipe below, I would double/treble the quantities for a pie of this size.


Ingredients

175g x Plain Flour

200g x Butter

3 x Tablespoons Sugar

2 x Teaspoons Milk

2 x Egg Yolks

1 x Sachet Dried Yeast

½ x Teaspoon Salt


Firstly sieve the flour and add the salt and sugar. Warm up the milk and yeast together and pour over your mix adding the eggs and knead the mixture to obtain a smooth and elastic dough. Cover it with a tea towel and let it rise for at least eight hours before using


The pie I have made here took 1.5kg of minced pork seasoned with salt and pepper, along with generous amounts of chopped parsley and herbs. This filling keeps with tradition with the herbs being prominent.


Once you have filled your pie casing, place 6 boiled eggs halved length ways and flat side down onto your filling and cover with a pastry lid, crimp and egg wash before baking for 75-90 minutes.


Allow to cool before slicing, ensure each slice gets an egg, here I have used medium sized eggs offering 12 portions per pie.


Now you have some time before Easter this year to practise this recipe!!

Thursday, 3 March 2011

Salami Cabinet


Here is a link to a nifty product which could be utilised as a salami cabinet:
http://www.theincubatorshop.co.uk/products/details/401.html

Thinking about curing salami, there are many ways we can put together a DIY cabinet for the job, one would be to use an old stand up fridge or freezer and insert this little machine:
http://www.theincubatorshop.co.uk/products/details/233.html

If you have enough money and you can afford the real deal, then look at the one pictured above as advertised by Tim at http://www.weschenfelder.co.uk/node/12125

For curing and air-drying meat products, we need both regularised temperature and humidity, so if building your own salami cabinet then think about a reptile incubator rather than an egg incubator as the repitile version is more geared up to suit our needs.

Only this week on offer at my local garden centre are some tall plastic lined narrow plant houses, like a tall cloche I suppose, so instead of using it to nurse your young plants, use it as your clean controlled environment for air-drying your meats.

Just one thing, if you follow these tips, do me a favour send me a picture, please!

Saturday, 19 February 2011

Black Pudding

(Please read this true story from the 1960's in a Lancashire accent as you will get more from it!)

I can recall a time as a child I was on holiday from school and as we could never afford to go away other than an odd day out at nearby Blackpool, we would congregate at my grand mothers house as that would be the coolest place to hang out. Here we would be with all our cousins and by heck they were loads of them and many uncles and aunts too, all of which would want feeding.


My grandma would count how many people were in the house and then send two of my cousins and myself to go and buy some black pudding, sausage and bacon from Harry Drivers corner shop. She would say, ask Mr Driver can we have it in the book til Friday, as this was payday and all outstanding bills would be paid on this day. Harry Driver was a small old man with bowed legs, I think he must have had a severe case of rickets or polio when he was younger and it seemed he wore a very long white smock to hide his disability.


On our return from the corner shop, my granddad asked, to make sure we went to the right shop “did yer get this from Harry Drivers?” of coarse we had, for we would not dare go anywhere else. My granddad went on to say “eeh that Harry Driver poor bugger, he could never play football nor stop a pig in a ginnel (passageway) with those legs”.


Well brunch was being cooked and the girls would be toasting bread on the open fire with long handled brass forks, also they would be much talking and laughter going on in the house, my grandma would laugh easily and so much so on this occasion she was choking with the giggles. She had to leave the house and go into the backyard as she was bringing up phlegm, a sight we saw often with our grandma as she was a smoker and often she would spit on the open fire where her deposits would crackle on the heat of the coals. This time as the house was full of guests she went to the long drop toilet that was situated in the corner of the backyard, a toilet of this type was normal for the houses up in the north in Lancashire, as very few houses then had bathrooms or flushing facilities. This would be a bench style wooden box with a hole in the middle, here the drop would be some six feet to the bottom, as kids sat on this long drop we used to pretend to be dam buster pilots on a mission, not that we could
ever imitate the bouncing bomb effect, you see it was fun releasing your bombs to the sound of the long awaited B’dush and your bombs reaching the water seem to take an age.


Shreds of newspaper would be hooked on to a bent nail for our use and if you were lucky you had the shiny waxy square sheets of San Izal (not that I ever knew which side to use, shiny or the dull side). To flush the loo, you had to return to the kitchen in the house and tip your waste washing up water down the sink where it would fall into a tipper box, when enough water was in the box it would tip with the over laden weight and the water would then gush in the direction of the long drop and flush away any solids.

My grandma coughing and spluttering had entered the long drop to spit and spit she did, but on this occasion out came her false teeth and straight down the loo they went. Well of coarse now everybody is laughing to the point of hysterics, as things calmed down the question was asked how on earth were we to get her teeth back? One of my uncles looked at us young boys and said “right then, lets have the smallest lad here then”, thankfully that was not me, for I was too broad in the shoulder, it was to be my smaller cousin Peter. He was taken or dragged screaming if I remember correctly to the long drop where he was taken by his ankles and dipped down the loo head first to feel for my grandma’s teeth, he complained vigorously about the poo down the loo and he was informed don’t be silly lad, they are just black puddings they won’t harm you! it was not long at all before he shouted he had found them. My uncle Clifford raised him back to the surface where Peter handed over the dentures to my grandma, she walked calmly back to the kitchen and quickly swilled her teeth under the cold water tap and popped them straight back into her mouth where she then carried on cooking brunch as if nothing had happened. I recall this memory often when I think of our family gathering and the cooking of that Full English with black pudding.


Black Pudding Basic Recipe

50% Pig’s Blood

25% Flare fat and head meat

25% Onions

Steeped pearl barley(optional)

Diced back fat to taste (optional)

Salt

Pepper

Quatre Spices

First step is to melt the Flare fat and soften the onions without browning them and then put them through a blender and put them back into the fat once more. Now add the salt, pepper and spices and any other ingredients you may wish to flavour your sausage and this can include any pieces of diced back fat you may have. Whilst ensuring you never bring the mix to the boil add the blood to the mix via a sieve to take out any last minute lumps which may have formed and turn off the heat and blend all your ingredients together.

You can now fill your skins with a ladle and plastic funnel allowing your filled skins to rest inside a wire basket or metal colander whilst you bring to the boil a large pan of water, once boiled reduce the heat to 80 degrees centigrade and cook your puddings for 20 to 30 minutes, pricking any sausage which may float to the surface with a needle.

Barley and crushed oats along with pieces of back fat are the best ingredients for a British style sausage, as is adding the Bath Chaps along with meat from the head. For a French style sausage it would benefit from 10% cream and with either apples or even walnuts added, the French are excellent foragers and in the Autumn village folk are often seen walking the many country lanes harvesting all sorts of edible treats to add to their Boudin Noir.

Are you still laughing?

Friday, 11 February 2011

Chorizo (choreetho)

This post was requested by my blogging friend Sommer J of Germany, remember to come back and click through to view her food blog recipe that inspired this post.

http://www.mamawithflavor.blogspot.com/2011/02/chorizo-and-pork-belly-with-white-beans.html


A semi air-dried sausage that is, in my opinion, hugely under-estimated and not used enough in our everyday cooking repertoire. It can be used in many places, on pizza is probably a favourite, sliced chunks in a cassoulet or a hot soup really work well, as they do in pasta dishes and rice dishes such as paella. Recently I have seen it sold hot in Borough Market in London, where one of the stallholders offers a toasted bread roll filled with a grilled chorizo split lengthways along with roasted red peppers and a dressed salad. The queue for this feast was more than 20 deep! Does that tell you something?


Chorizo can be put in 36mm boar casings.


Tip: Replacing some of the water in the mix with olive oil plus a few shakes of Tabasco sauce works very well.

Another, and probably my favourite chorizo recipe is this semi air-dried sausage that, unlike salami, is not left to develop a white powdery mould on the surface.
Ingredients

7.5kg pork

1.5kg beef

240g salt

24g saltpetre (WARNING..please check the legal useage and amounts of saltpetre in your country before following this recipe)

20g ground black pepper

10g nutmeg

10g hot chilli powder

40g paprika

280g mild chilli powder

100ml olive oil

Method

1. Trim the meat thoroughly, discarding any sinews.
2. Mince using a 5–6mm plate.
3. Add and blend the seasoning to the meat mix.
4. Fill 34–36mm boar casings and make to length, approximately 50cm.
5. Tie the two ends together using a fine butchers twine.
6. Pre air-dry at 25oC (77oF) for 6hrs, then air-dry for about 2 weeks at a constant 15c (60 oF) and 80% humidity.
7. The shelf life will be several weeks from the end of the drying stage.
8. Wiping with olive oil before sale or serving will enhance the appearance and colour of the sausages.
A large chorizo can be made using 54mm ox casings and with added back fat cut into thumbnail-sized pieces, add just enough to offer an alternative texture to the main mix. Of course the pre-drying and drying times need to be extended for the larger version. Once mature this chorizo can be served as thin slices.


Tip: When making air-dried or salami sausage it is best to remove all visible silver skin and sinews. Silver skin is the fine bluish film of skin you find in between the joint of two muscles, the outer skin on a tenderloin demonstrates this well. Use only trimmed lean meat then add back the fat to the mix before seasoning. Experiment with any recipe that takes your fancy, you will be surprised and maybe delighted with your efforts.